 in the bottom
right corner of the movie object to access the Video Analysis toolbar.
A graph will also be displayed and a new set of X and Y columns will be
added.
in the bottom
right corner of the movie object to access the Video Analysis toolbar.
A graph will also be displayed and a new set of X and Y columns will be
added. You can use the Video Analysis tool to create a graphical representation of the motion you see in a movie or picture. This is ideal for mathematically analyzing real world events. Instead of marking one object across frames (time) as you would in a movie, analysis of a picture allows you to mark many points on one frame. This is useful in getting the points along a curve, for example.
After you insert a movie or picture from the Insert menu, you will be able to access the Video Analysis toolbar. If you would like more information about how to perform video analysis, a detailed procedure is available as well as a tutorial. Choose Open from the File menu, and then look in Experiments > Tutorials to access the tutorial. Additional information about video analysis is also available on our web site at http://www.vernier.com/til/1925.html.
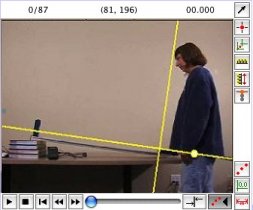
The button furthest on the left is the Play button. Click it to play the movie. The next button to the right is the Stop button. It will stop the movie during replay. The third button from the left "rewinds" the video to the beginning. The next two buttons move the video to the previous or next frame.
Click in the bottom
right corner of the movie object to access the Video Analysis toolbar.
A graph will also be displayed and a new set of X and Y columns will be
added.
 |
Select Point: Highlight a trace point in the movie object. |
 |
Add Point: Trace the path of the moving object in the movie with points. |
 |
Set Origin: Choose a point in the movie where you want the origin to be set. |
| Move the cursor over the round handle and hold down the mouse button to rotate (tilt) the x-axis. This is helpful, for example, when studying the motion of a cart rolling up or down an inclined ramp. For experiments like these where the x-axis is not horizontal, it is convenient to rotate the coordinate system so that the x-axis is parallel to the ramp. | |
 |
|
 |
Set Scale: When you add points to the movie, the program initially records the coordinates of each point in screen pixels. This option allows you to convert those coordinates to a physical measurement, e.g. meters. For example, a meter stick appears in the foreground. That meter stick can be used to set the scale. You will drag the distance desired in your movie, then record that distance in the scale dialog that pops up (see below). In the movie above, you can drag over the meter stick, then record it as 1 m in the dialog. |
 |
Photo Distance: Based upon the scale you set (see above), you can create an additional line on a movie or picture to display distances. The value and units of that distance will also be displayed. For example, in a basketball shot experiment, you can set the scale of the picture using a meter stick visible against the wall. Then use the Photo Distance button and drag a line from the shooter's head to his feet to determine that he is 1.7 meters tall. This draws a line on the picture or movie with an accompanying box displaying the distance. Double-click on the box to bring up the Photo Distance Options dialog, where you can adjust the appearance and displayed precision. |
 |
Set Active Point: Adds new x,y columns and becomes the current/active point. The active point set will have a horizontal line on either side of it. You can also add a center of mass calculation. |
 |
Toggle Trail: Displays or hides all the points that have been added up to the current time. For example, if you have a total of 10 points, one point per second, and you toggle at 5 seconds, you would see the points from 0-5. |
 |
Show Origin: Display the origin on the movie object. Click again to remove the origin. The origin is set with the Set Origin button. |
 |
Show Scale: This will show the line that was used when setting the scale (see Set Scale). |